Animals on Mobile
Only users who are assigned to a Role with Herd Write permissions can use this feature. If your account only has Herd Read permissions, you will not be able to use this feature. See Edit Dairy User Permissions and Manage Dairy Roles for more information.
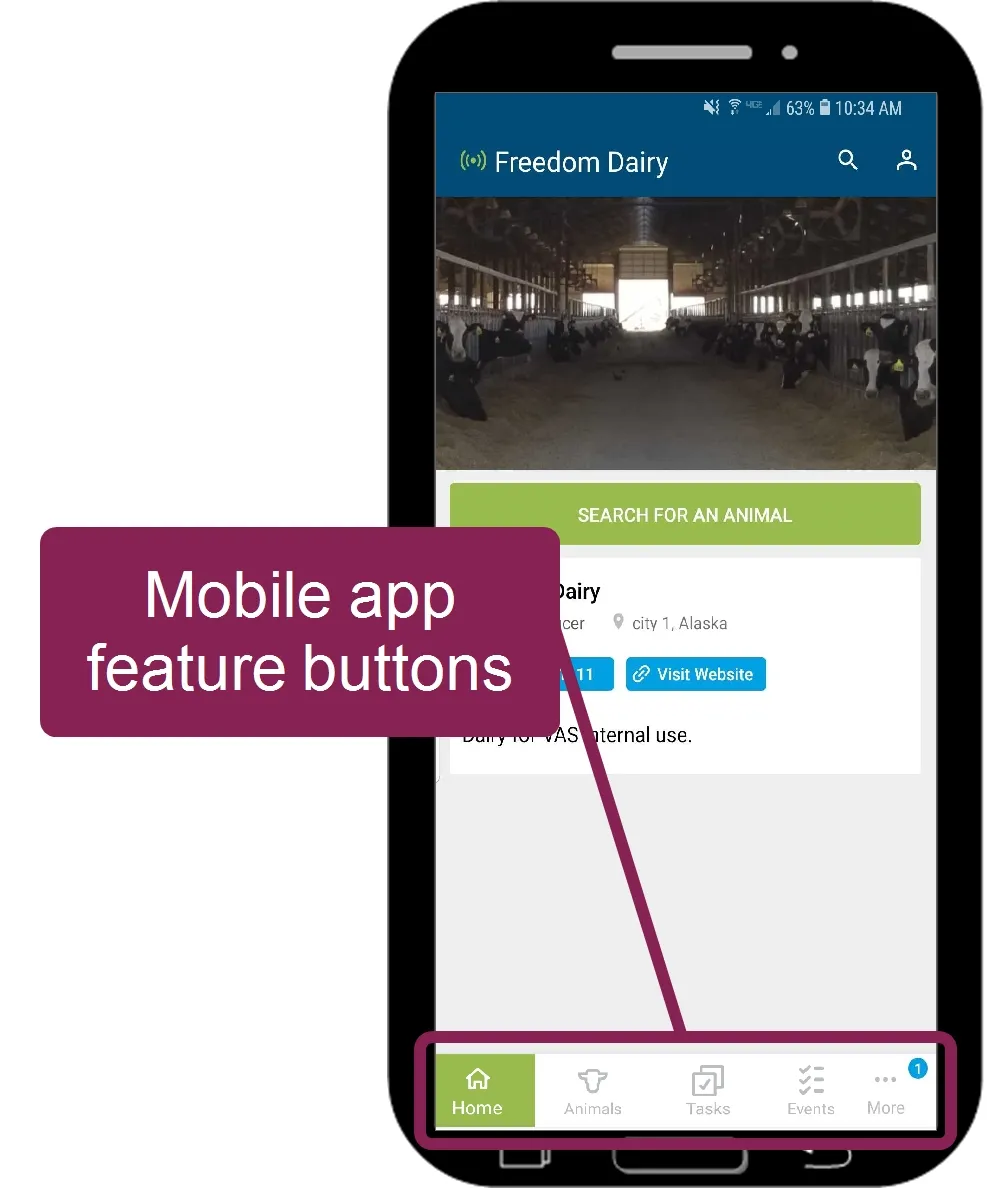
The Animals page in the mobile app allows you to view animals in your herd. When you tap the Animals button at the bottom of the mobile app, it opens to a list of all animals in your herd. From there, use the search field at the top to find a specific animal, or use the Filters option to narrow the list by RPRO code. Tap on any animal in the list to view its CowCard.
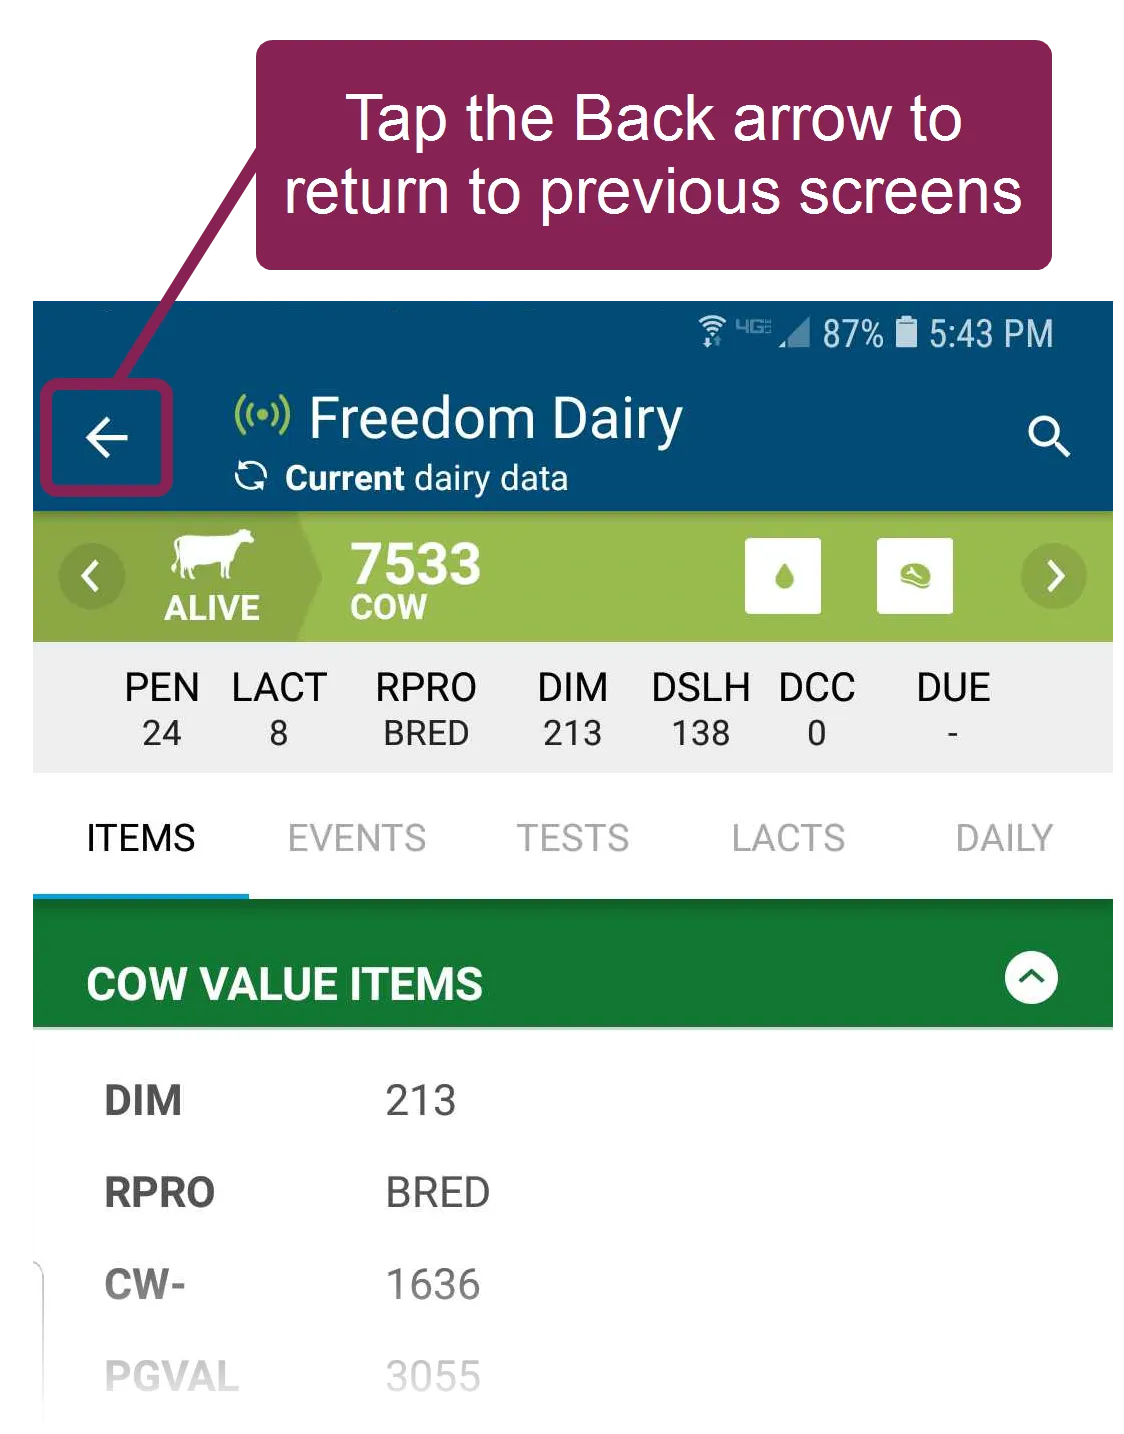
If you do not see the Animals button at the bottom of your screen, tap the Back arrow at the top left of the page until you return to one of the main feature screens. From there, you'll find the feature buttons at the bottom of the screen.
See the topics below to learn more:
Follow the guidelines below when finding and viewing animals.
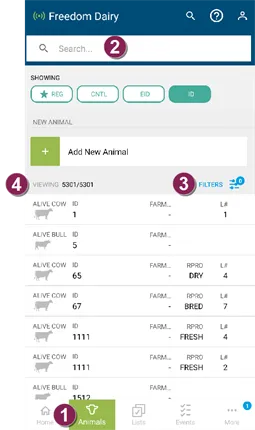
Tap the Animals tab to view a list of all animals in your herd.
- The list is sorted from lowest to highest ID number.
- Scroll up and down to view the list, and use the Search and Filter options defined below to narrow the list.
There are two main ways to find an animal in the mobile app: the Search bar and the Animals page. You can use the Search bar at any time by tapping the search icon at the top of the page or the Search for an Animal button on the Home Page.
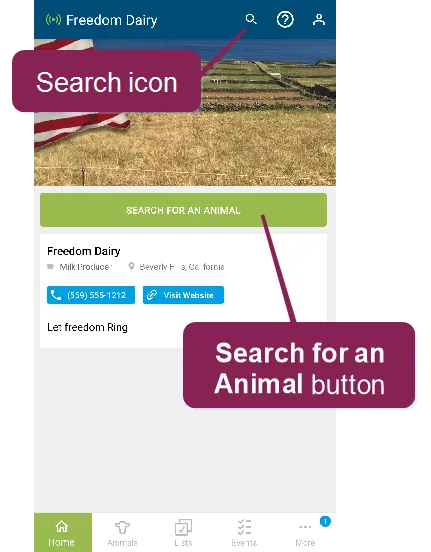
Once you begin typing your search criteria, all matches that contain all of the characters entered are displayed in a list below the search field. You can find an animal by its ID, BNAME, CNTL, VISID, REG, or EID, though not all of these items may be available in your dairy. Tap any identifier to search for an animal by the selected identifier.
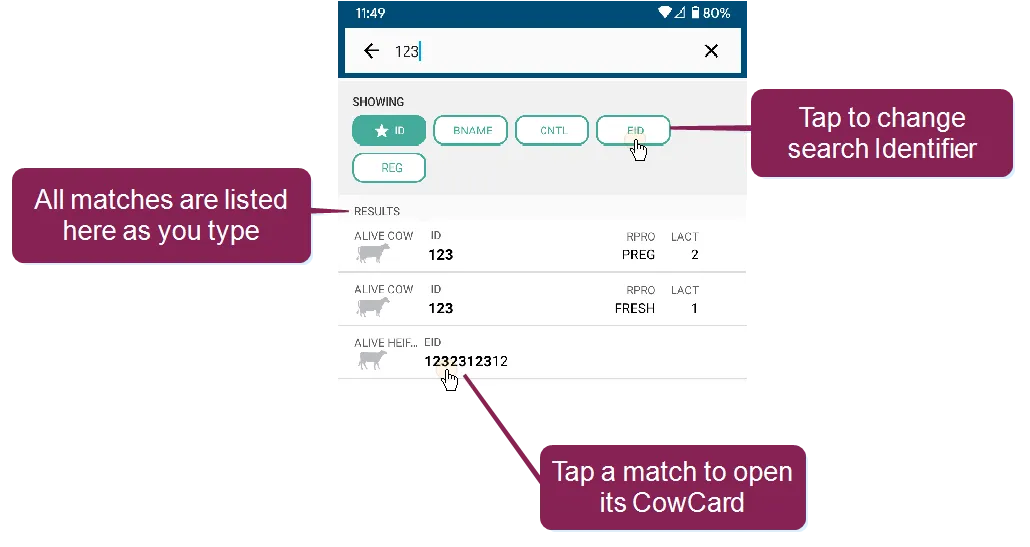
On the Animals page, you can either scroll through the list of animals at the bottom of the page or use the Search bar and Showing tags to refine your results.
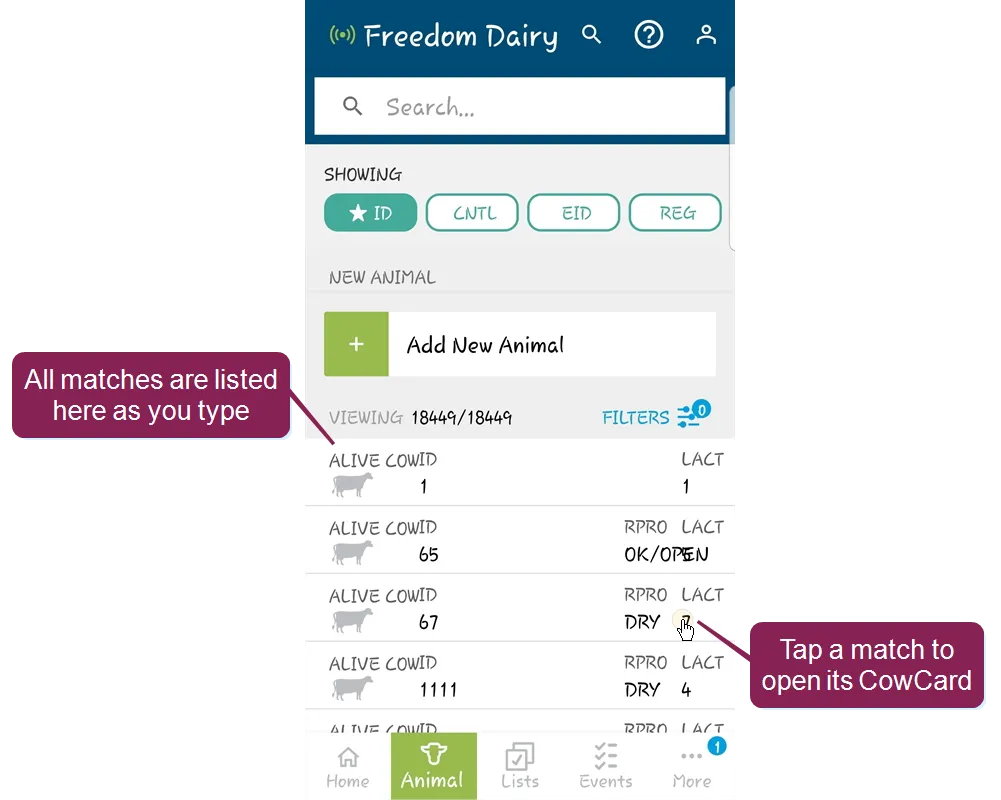
Tap on any match to view the animal's CowCard.
Use the Filters option  at the top right of the list to show only specific RPRO codes. The small number displayed on the Filters button shows how many filters are currently applied. See Filter the Animals ListFilter the Animals List for more information.
At the top left of the list, you can see how many animals you are currently viewing in relation to the total herd.
You can easily add a new animal to your herd by tapping the + Add New Animal option at the top of the Animals page and then entering identification information for the animal. Once the animal is added, you can view it within your herd.
Follow these steps to add an animal:
From the Animals page, tap + Add New Animal.
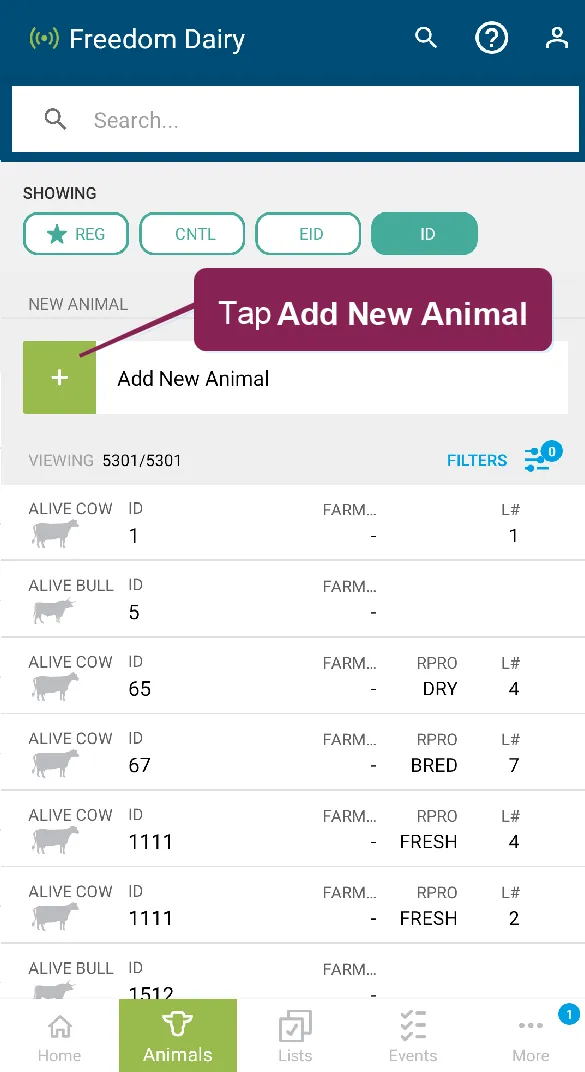
Choose the Animal Type and add required details.
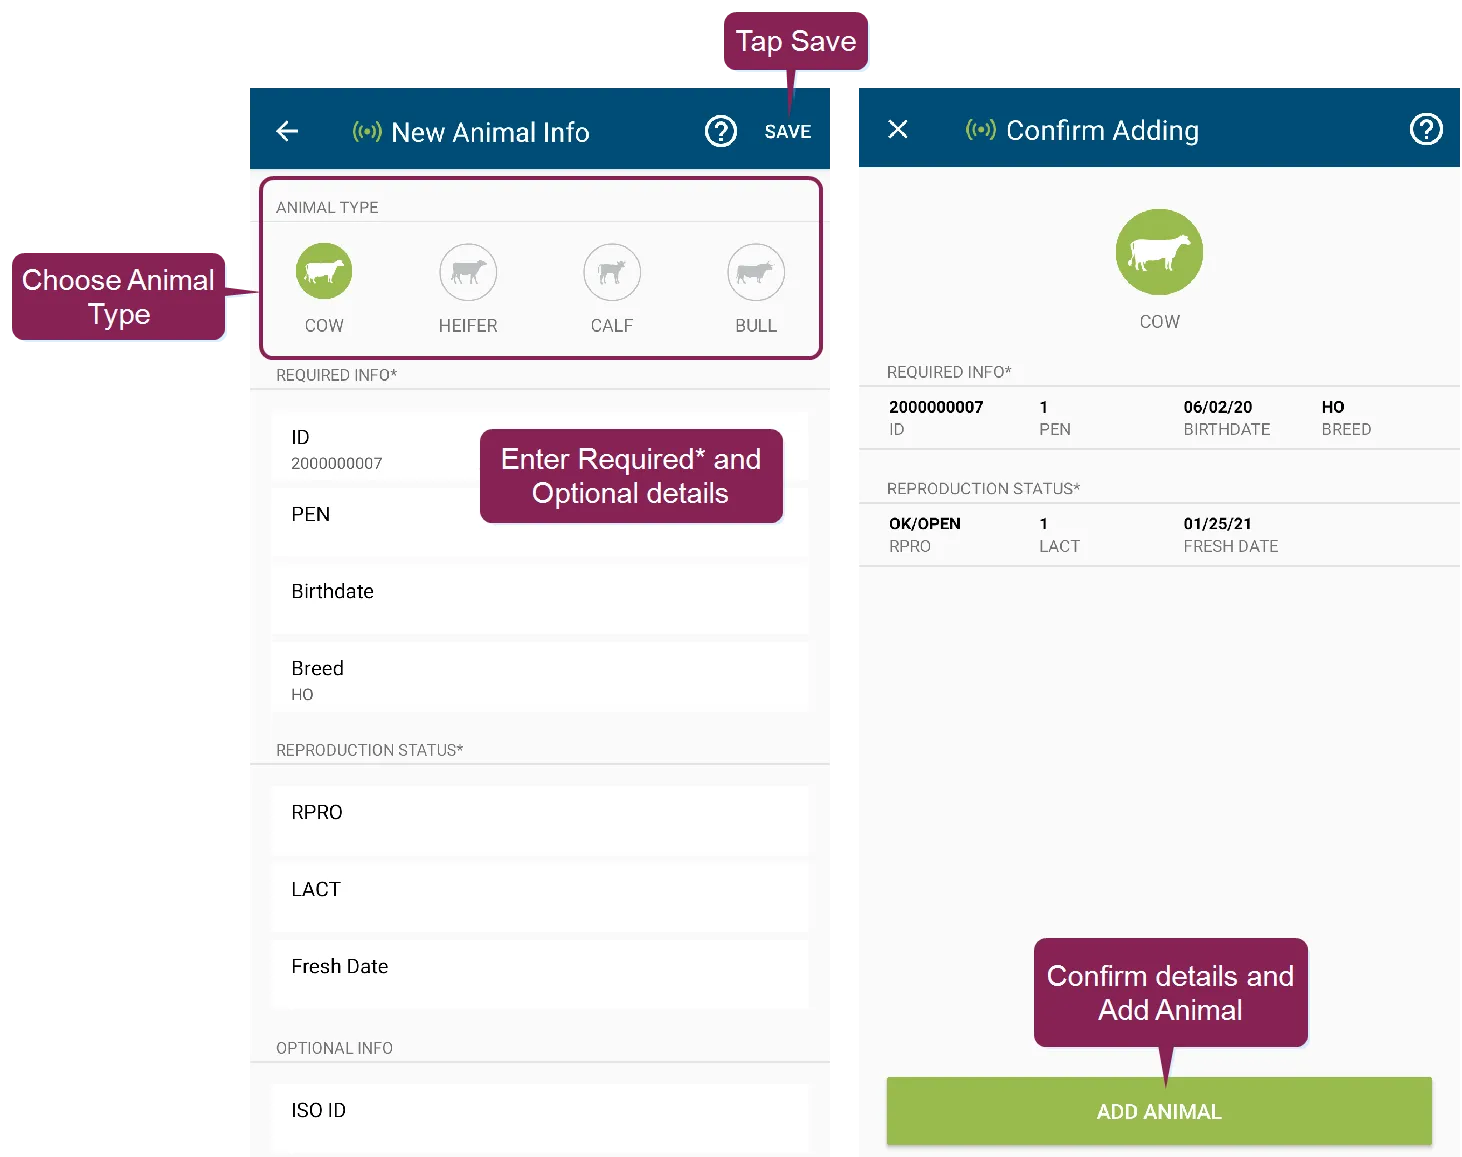
NOTE: You must enter information in all the required fields, which are marked with an asterisk (*). Depending on the Animal Type selected, different fields are available and required.
Enter other optional animal details. The Dam Cow Number, Dam ISO ID, Dam Name, and Sire fields are searchable. Start typing in these fields to search for matching animals.
Tap Save.
Confirm the animal details and tap Add Animal. If you need to correct any of the information you've entered, tap the back button to return to the data entry page.
The system displays a message at the bottom of the page stating that the animal was added.
NOTE: If you do not have an active internet connection or are using the app in offline mode, added animals will sync to PULSE as soon as your device is back online.
Follow these steps to filter the animals list:
Tap the Filters option at the top right of the Animals page to open the Animal Filters page.
In the Animal Filters page, choose one or more RPRO code filters.
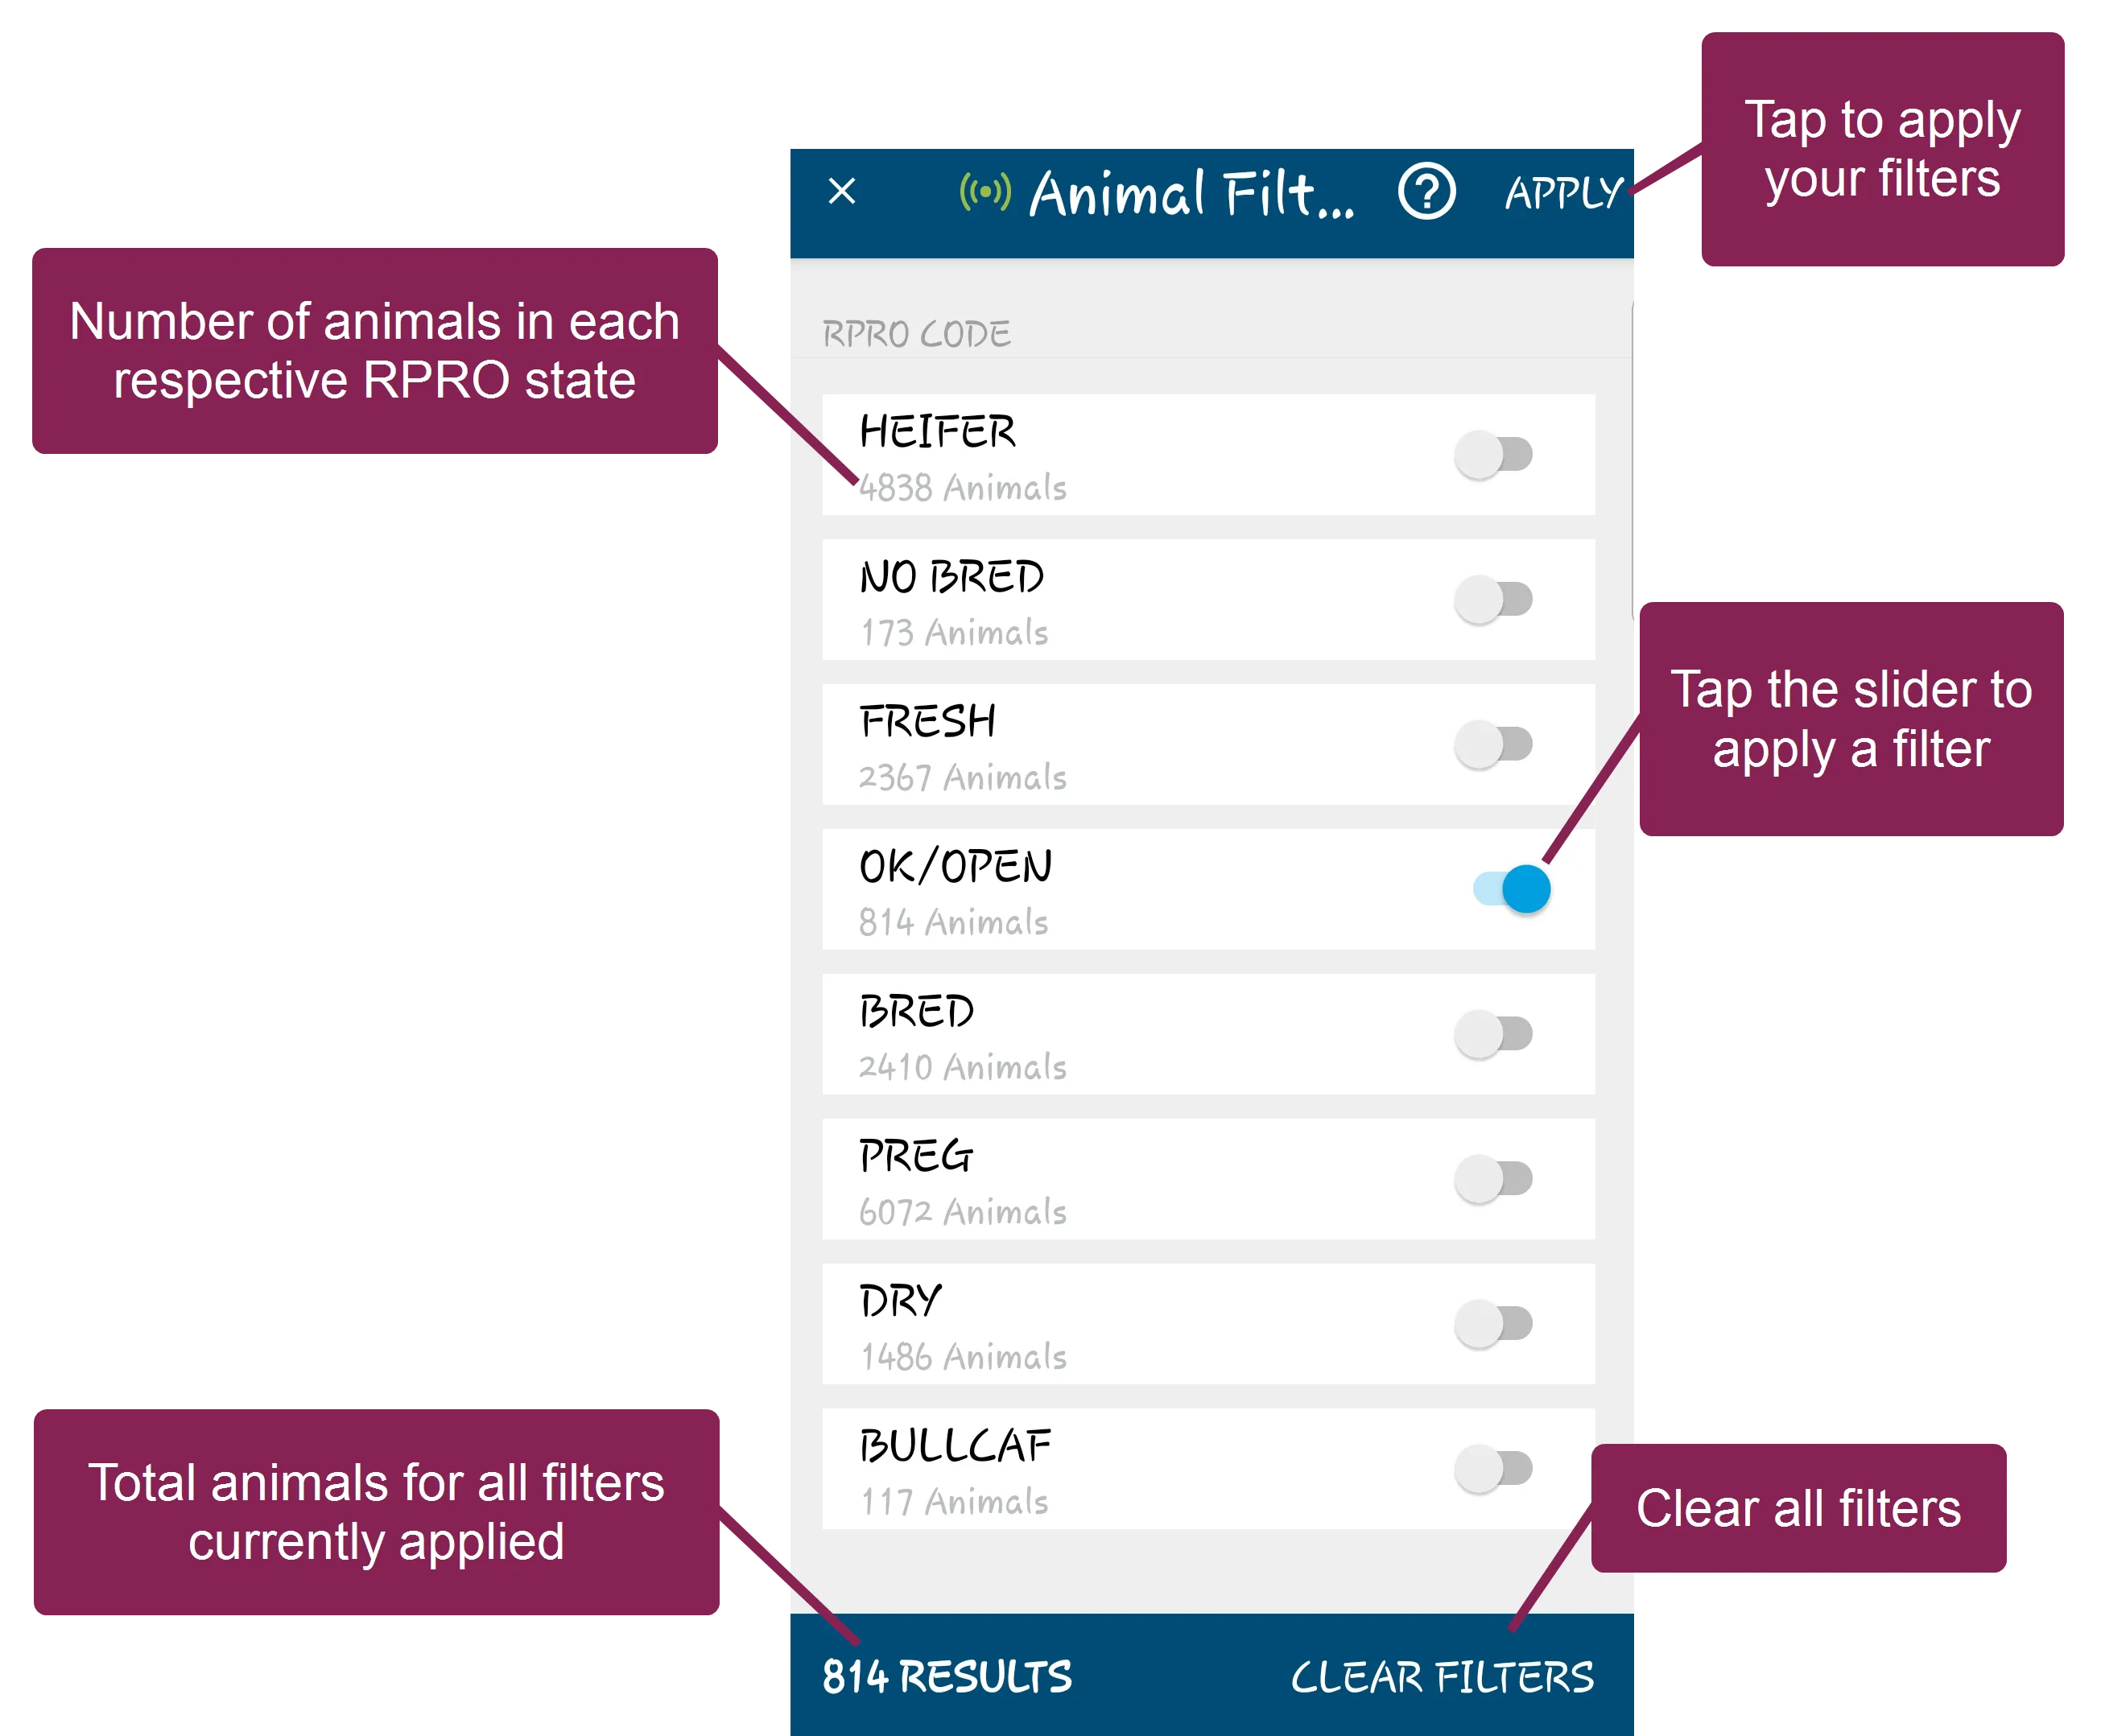
Note the following information on the Animal Filters page:
- The number of animals in each RPRO condition is displayed beneath each RPRO code so that you can see how many animals will be in the list when you apply its respective filter.
- The total number of animals that will be displayed in the filtered list is shown at the bottom left of the page.
Tap the Apply button at the top right of the Animal Filters page to apply your selected filters.
Review your filtered list in the Animals page.
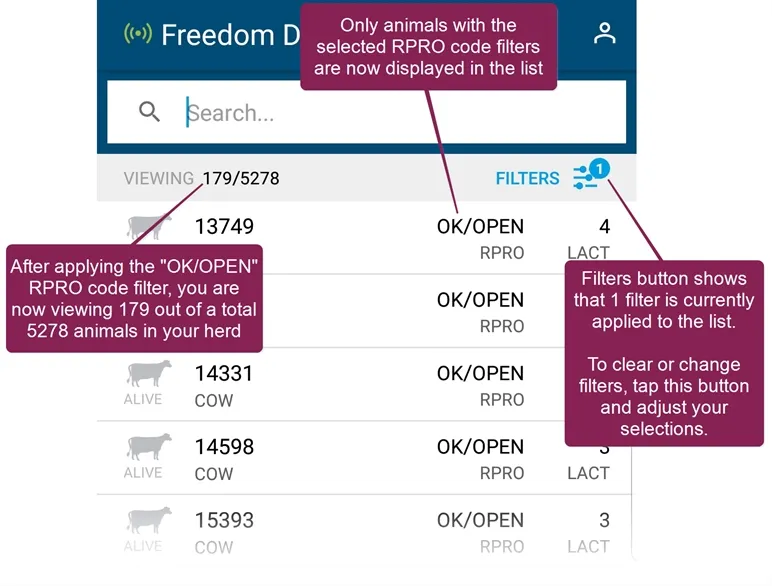
NOTE:
- The codes you select in the Filters list will be the only ones displayed in the Animals list. Be sure to tap Apply at the top right of the Animal Filters page to apply your filters.
- When you apply one or more filters, the animals with non-selected codes will no longer be displayed in the list.
- To remove all filters, open the Animal Filters page and tap the Clear Filters option at the bottom right. This action clears all filters and displays the full list of animals again.
- After applying your filters, the top left of the Animals page adjusts the "Viewing" numbers. As shown in the 2nd example above, after applying the filter to show only the animals with the RPRO code of OK/OPEN, you are now viewing only 179 out of the total 5278 animals in the herd.
Tap any animal in the Animals page to view its CowCard. When viewing mobile CowCard, follow the guidelines below.
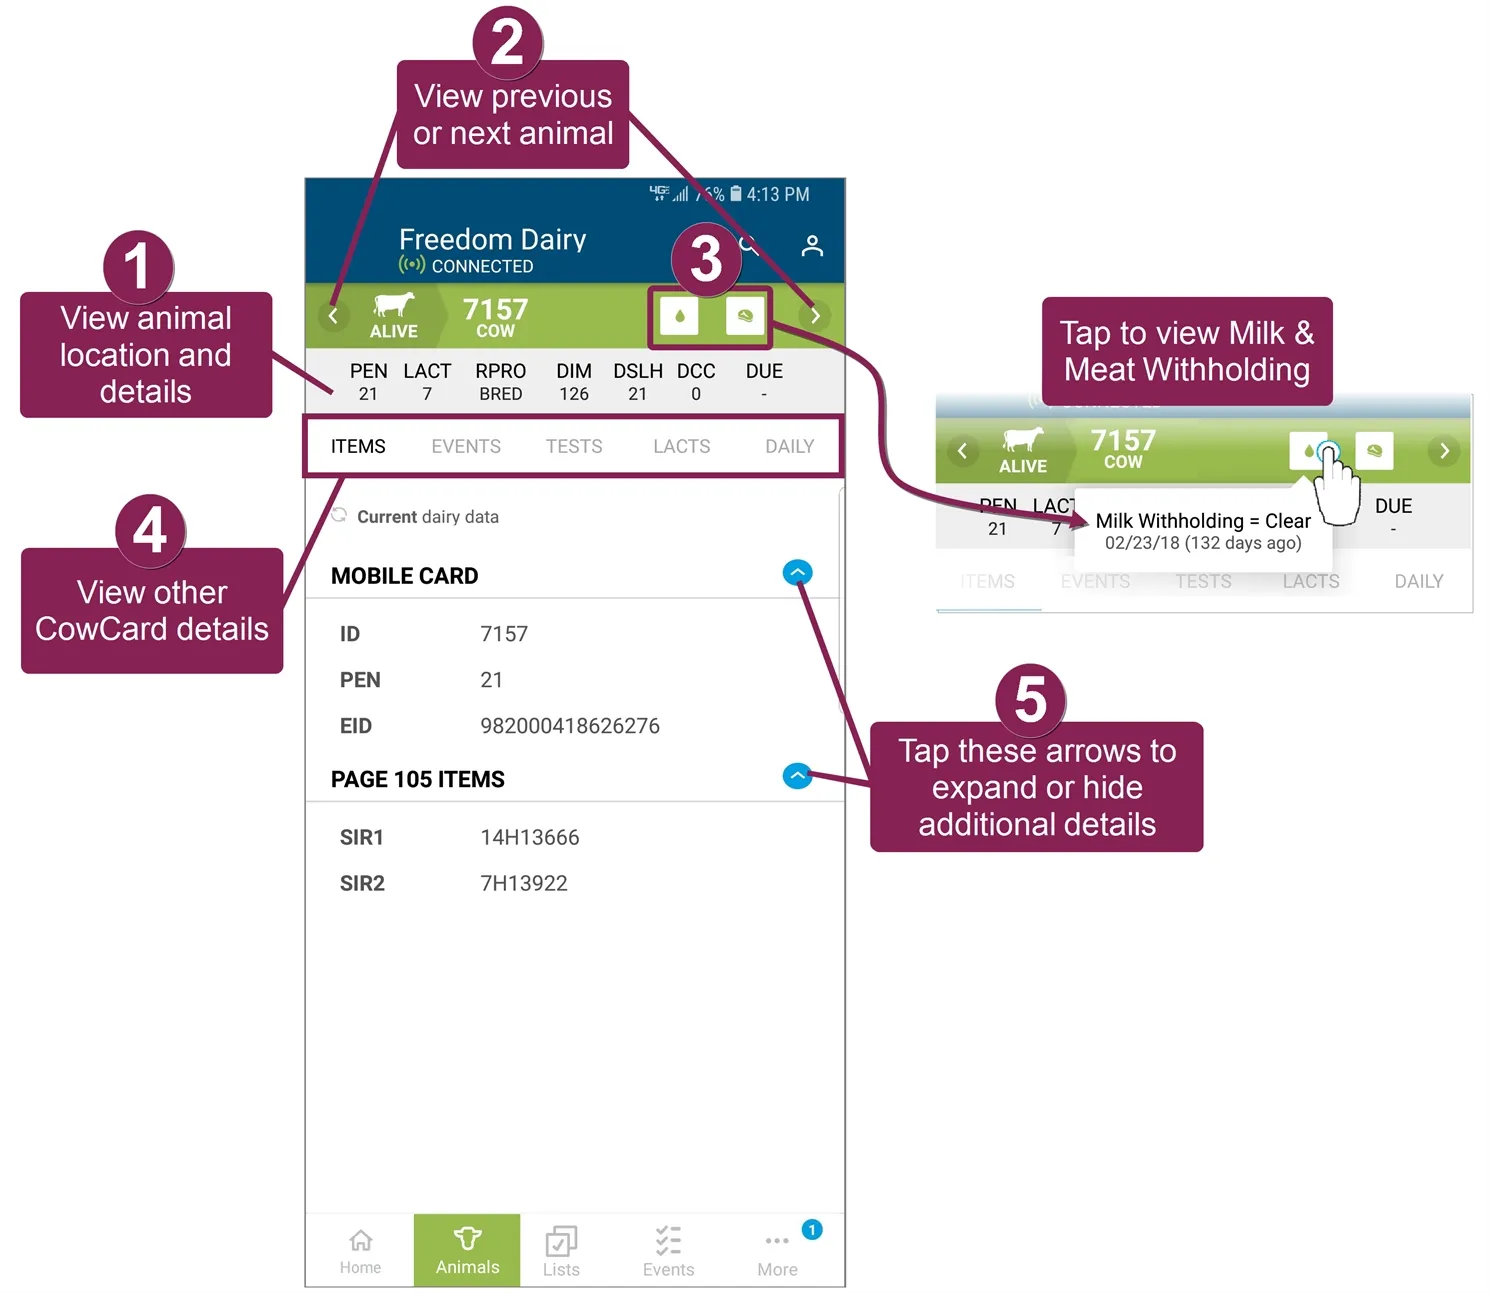
- View the animal's current location and details at the top of the CowCard.
- Tap the
 and
and  arrows on the left and right of the green CowCard header to view the previous or next animal.
- Tap the milk
 and beef
  icons at the top of the page to view the animal's current milk and meat withholding status.
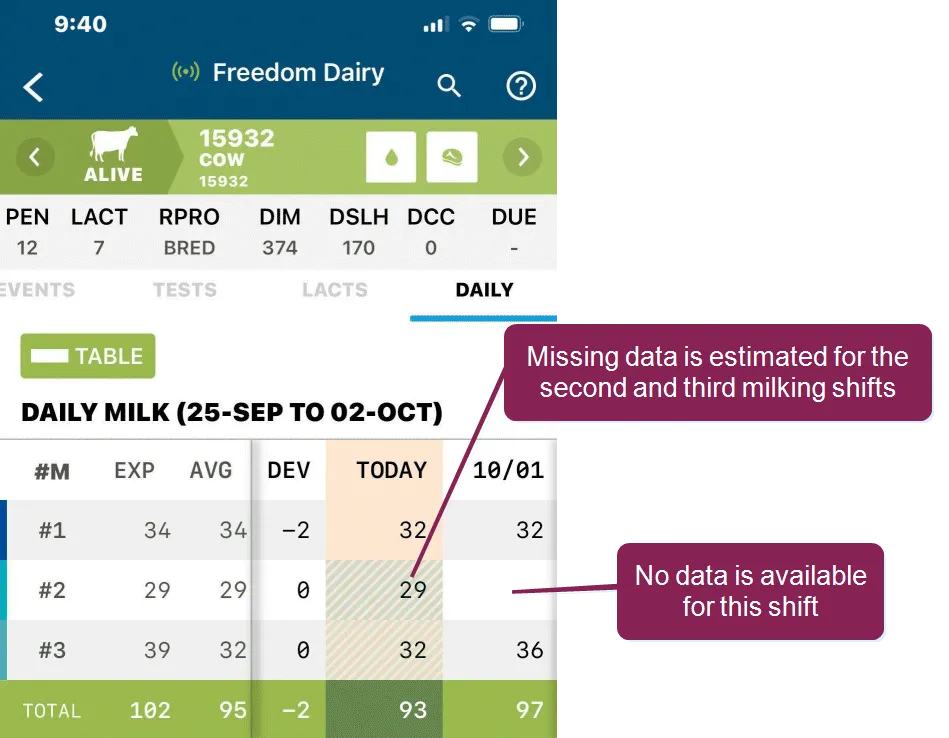
- Tap the options below the animal details to view other parts of the CowCard, such as Events, Tests, Lactations, Daily Milk, etc. When viewing daily milk data, each shift is color-coded. If the animal is identified while entering the parlor, but its actual milk weight for a shift is not captured by the parlor equipment, the shift average is added as an estimated milk weight. On the bar graph, estimated milk weights are represented by diagonal stripes. If an animal fails to be identified in the parlor for a shift, no data is included for that shift.
- Tap the small blue

 arrows to expand and collapse additional details within each page.
Tap any animal in the Animals page to view its CowCard and update items.
NOTE: Only stored item values can be changed. Calculated item values (such as Age), as well as certain restricted items, cannot be edited.
Follow these steps to edit items:
- Tap the Edit Items button at the bottom of the page.
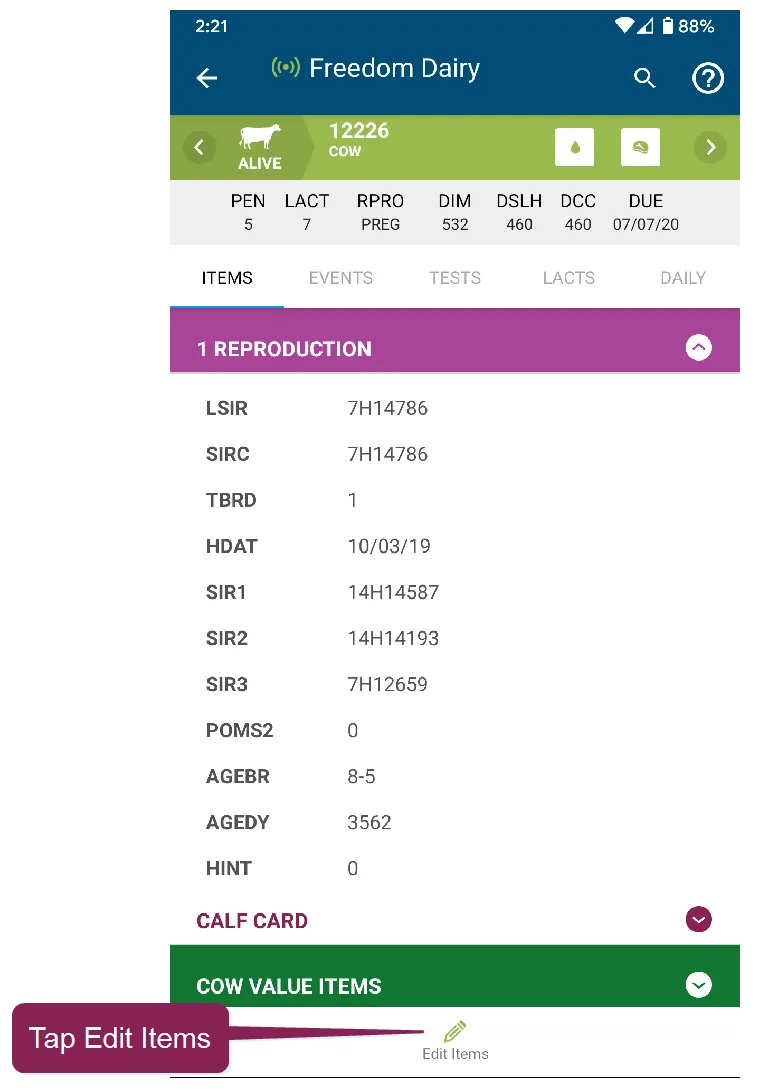
- Scroll to find the item to edit and tap the item name.
- Depending on the item type, the app opens a page that allows you to change the date or text, or to select an item from a list.
- Enter or choose the correct item.
- If necessary, update additional items for this animal. Updated items remain highlighted in green until you tap Done.
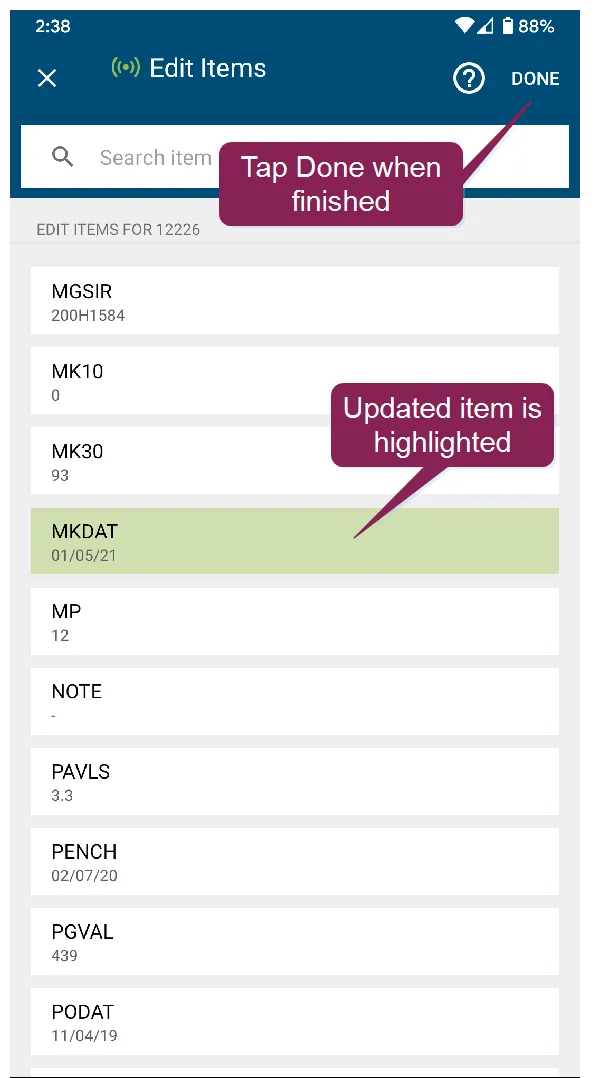
- Tap Done to save your changes.
NOTE: If you do not have an active internet connection or are using the app in offline mode, your item updates will sync to PULSE as soon as your device is back online.
Only users who are assigned to a Role with Herd Write permissions can use this feature. If your account only has Herd Read permissions, you will not be able to use this feature. See Edit Dairy User Permissions and Manage Dairy Roles for more information.
Tap any animal on the Animals screen to view its CowCard. Follow the steps below to continue:
Tap Add Event at the bottom of the screen.
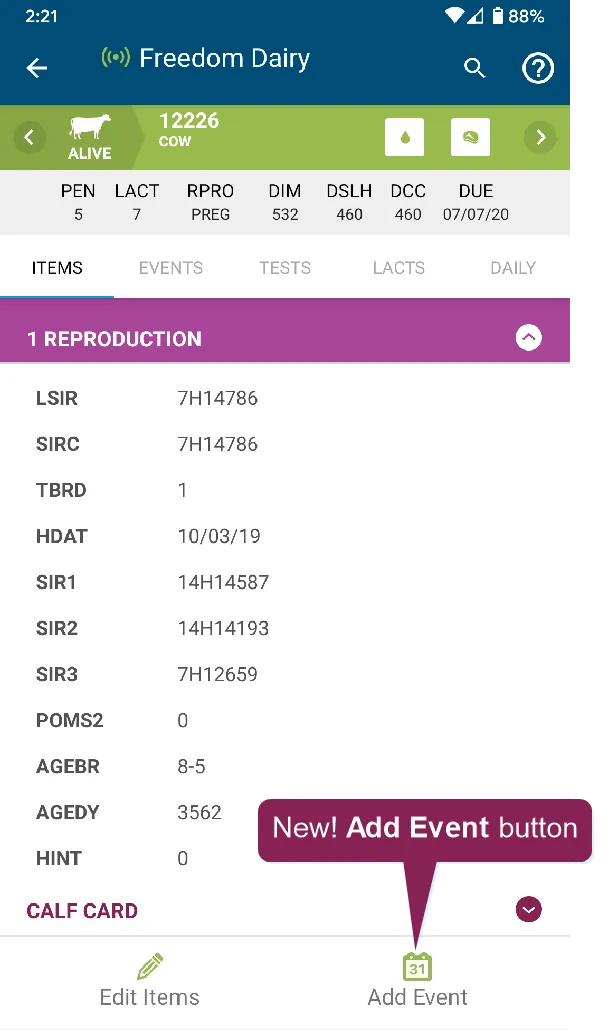
On the Add Event screen, scroll to the event you want to add and tap the event name.
The mobile app opens the event-specific screen. All required fields are marked with the * (asterisk) symbol.
Tap Save.
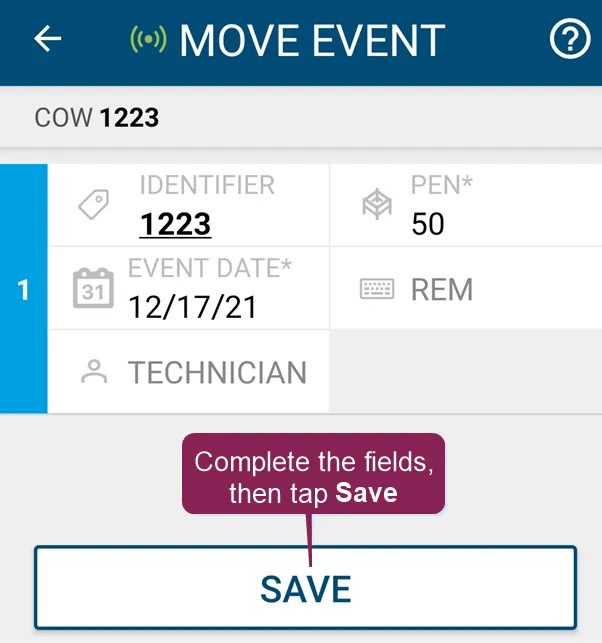
Once added, the event is displayed on the Events tab of the CowCard.
NOTE: Saved events display on the CowCard after a brief delay if you have MyDC. If you have DC Unlimited, saved events display after the system synchronizes with the on-premise DairyComp. If you do not have an active internet connection or are using the app in offline mode, added events will sync to PULSE as soon as your device is back online.